How to backup Jenkins-on-Kubernetes to Google Cloud Storage and NEVER lose your pipelines again!
Share on:How I lost my Jenkins and ALL of my Pipelines
Do you run Jenkins on Kubernetes? Don’t you love how you can put all your pipeline code, plugins, credentials, and configurations into an ephemeral container? I’ve automated hundreds of pipelines that way and it just saves so much time!
Well, image LOSING ALL your Pipelines in a hearbeat! 😱
This happened to me at my home lab. I was trying to upgrade my Kubernetes cluster where I have Jenkins deployed and I accidentally blew it and had to redeploy the entire cluster AND Jenkins from scratch! 😩
I had to reconfigure Jenkins and setup all my 27 pipelines by hand. While setting up 1 pipeline is simple, doing that 27 times by hand is a loooooong ⏰ and tedious process, even if the pipelines are stored in source control.
This could happen to YOU!!!
I’ve worked with companies who use Jenkins as a CI/CD Server on Kubernetes. Anybody (including yourself) could mess up a cluster upgrade (or any other maintenance task) and blow up the Kubernetes cluster and Jenkins! This can cause serious production issues if you need to deploy a critical app update.
So I decided to backup Jenkins to Google Cloud Storage (GCS).
I chose GCS simply because it’s the Cloud Provider I am currently using at work and it meets my home-lab requirement of being an off-site backup.
Since I don’t work on my home-lab full-time, whatever solution I ended up going with had to be fully automated and require no new skills. I just needed to figure out what that was going to be.
Jenkins Helm Chart to the Rescue
While there are options like Jenkins Configuration as Code or Kubernetes Volume Snapshots, most of them didn’t fully meet the fully automated and require no new skills criteria.
Luckily, the community-maintained helm chart for Jenkins comes with an optional CronJob that allows you to back up the Jenkins Persistent Volume Claim to any of the major cloud providers' object storage solution, including GCS.
Since I was already using Helm to deploy Jenkins on Kubernetes and was using Google Cloud at work, I felt this was as great place to start.
With that being said, you are about to learn how to Backup Jenkins on Kubernetes to a GCS bucket by changing a simple field in the Jenkins Helm Chart.
Pre-Requisites
While the concepts of this guide are simple (I mean, this is not the first or last back up and restore guide for Jenkins), please know that there are some technical knowledge that is required for you to follow this guide. You will need the following knowledge:
- Jenkins user and management experience.
- Kubernetes.
- Helm.
- Google Cloud Platform (GCP) or other Cloud Providers.
And here are the actual tools that you will need:
- A Kubernetes cluster with Internet access.
- You could use minikube to follow along.
- gcloud.
- kubectl.
- helm.
(Optional) Setup Minikube
If you are going to follow along this guide, you will probably be testing the commands I share on a test environment. So, I figured I would leave you with some instructions for how to set up minikube on your system.
# After downloading minikube, start minikube
# 4092 MB is needed for Jenkins and Backup Job to run properly.
minikube start --memory=4092;

# Set kubernetes version to avoid storage class issue
minikube config set kubernetes-version v1.21.2;
Now you should be ready to follow and execute the steps of this guide.
Architecture Overview
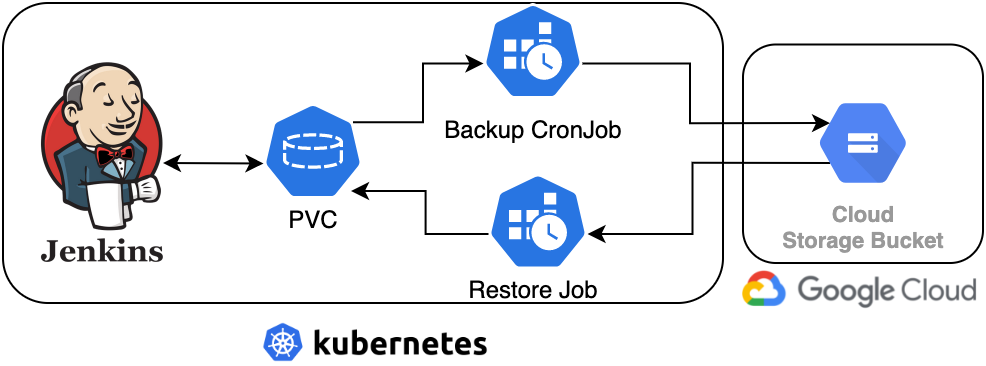
Image 1: Jenkins Backup Architecture
Based on the diagram above, let’s break down what we’re actually building today:
- A Google Cloud Storage (GCS) Bucket to hold all the Jenkins backups.
- Deploying a Jenkins server using Helm on a Kubernetes cluster.
- A Persistent Volume Claim (PVC) to hold Jenkins Data.
- A Kubernetes CronJob that will periodically (once a day) backup the contents of the PVC to the GCS bucket.
- A Kubernetes Job that will copy the latest Jenkins backup in the GCS bucket to the PVC.
Now that we know what we are building, let’s go ahead and get started.
1. Create Google Cloud Storage (GCS) Bucket
First things first, before we can back up Jenkins we need to set up a Google Cloud Storage bucket. This GCS bucket will contain all of the backups for Jenkins, which are simply the contents of the Persistent Volume Claim that holds the data for the /var/jenkins_home folder.
To do so, follow the steps below in a terminal window:
# Login to your GCP account and select the project id to create the bucket into
gcloud init;
gcloud auth login;

# Change to the project id you want to use
gcloud config set project "CHANGE_ME";

# Create storage bucket with Unique Name
gsutil mb gs://CHANGE_ME;
2. Create Google Cloud Service Account with GCS Admin permission
Now that your bucket is ready, we need to create a GCP Service Account with GCS Read and Write access. Then we need to create a Service Account Key that we can use in an automated Cron back up job that puts all of the Jenkins data into the bucket. This same service account key will be used later to restore a new Jenkins installation from a GCS back up.
To do so, follow the steps below in a terminal window:
# Enter project ID from previous stem
PROJECT_ID="CHANGE_ME";
SERVICE_ACCOUNT_ID="jenkins-backup-sa";

gcloud iam service-accounts create ${SERVICE_ACCOUNT_ID} \
    --description="For Jenkins Backup Automation" \
    --display-name="Jenkins Backup SA";

# Grant the GCS Admin Role to Service Account
gcloud projects add-iam-policy-binding ${PROJECT_ID} \
    --member="serviceAccount:${SERVICE_ACCOUNT_ID}@${PROJECT_ID}.iam.gserviceaccount.com" \
    --role="roles/storage.admin";

# Create service account key and save to sa-credentials.json file
gcloud iam service-accounts keys create sa-credentials.json \
    --iam-account="${SERVICE_ACCOUNT_ID}@${PROJECT_ID}.iam.gserviceaccount.com";
Now that we have a GCS bucket and a Service Account with GCS read andwrite access, we can move on to actually the deploying Jenkins on Kubernetes and start creating backups.
3. Create Jenkins Namespace
First of all, we need to create a namespace in the Kubernetes cluster for us to deploy everything. To do so, run the following command:
kubectl create namespace jenkins;
4. Deploy GCP Service Account Secret
In order for the backup job to upload the contents of the PVC, we need to provide it with an existing secret that holds the sa-credentials.json GCP Service Account Key. To do so, run the following command:
# Create secret from file
kubectl -n jenkins create secret generic jenkinsgcp --from-file=sa-credentials.json=./sa-credentials.json;
5. Create Values File for Jenkins Chart
We are getting closer to deploying Jenkins and the backup CronJob. Before we do so, we have to create a values.yaml file with the values that will enable the Persistent Volume Claim for Jenkins Data and the Backup CronJob.
Create a file called values.yaml, enter the following content, replace the BUCKET_NAME variable with the name of the bucket that you created in the previous steps, then save the file:
backup:
  enabled: true
  schedule: "0 2 * * *" # Runs every day at 2 am
  existingSecret:
    jenkinsgcp: # This is the secret name
      gcpcredentials: sa-credentials.json # The service account file in the secret
  destination: "gcs://BUCKET_NAME/jenkins-k8s-backup" # Replace with Bucket Name from previous step
controller:
  initializeOnce: true # Installs latest plugins as soon as Jenkins starts
  installLatestPlugins: true
persistence:
  enabled: true # So that we have a PVC that we can backup
NOTE: The gcpcredentials key in the jenkinsgcp field tells the Helm chart that we will be using a GCS bucket as our backup.
6. Deploy the Jenkins Chart
Finally, we are going to deploy Jenkins and the CronJob using the community helm chart and the values file that we created in the previous step.
To do so, run the following commands:
# Add Jenkins Helm Repo
helm repo add jenkinsci https://charts.jenkins.io;

# Get latest updates from Helm Repo
helm repo update;

# Deploy Jenkins Helm Chart
helm upgrade --install jenkins --namespace jenkins \
    -f values.yaml \
    jenkinsci/jenkins --version 3.5.8;

# Run multiple times until "jenkins-0" pod is running
kubectl -n jenkins get pod -o wide;

# Once running, obtain Jenkins Password and save into a file
kubectl exec --namespace jenkins -it svc/jenkins -c jenkins -- /bin/cat /run/secrets/chart-admin-password > jenkins-password.txt;

# Print the password on screen, we will use this shortly
cat jenkins-password.txt;
Before we access the Jenkins Web Dashboard, let’s checkout the resources that were actually deployed with this chart. To do so, run the following command:
kubectl get all;
Which will return an output similar to the following:
NAME            READY   STATUS    RESTARTS   AGE
pod/jenkins-0   2/2     Running   0          3h34m

NAME                    TYPE        CLUSTER-IP      EXTERNAL-IP   PORT(S)     AGE
service/jenkins         ClusterIP   10.102.70.1     <none>        8080/TCP    3h34m
service/jenkins-agent   ClusterIP   10.104.115.70   <none>        50000/TCP   3h34m

NAME                       READY   AGE
statefulset.apps/jenkins   1/1     3h34m

NAME                           SCHEDULE    SUSPEND   ACTIVE   LAST SCHEDULE   AGE
cronjob.batch/jenkins-backup   0 2 * * *   False     0        <none>          3h34m
All the resources above are related to the Jenkins pod, which runs the Jenkins dashboard and deploys worker pods to run the Jobs.
The only exception is the cronjob.batch/jenkins-backup, which is the Kubernetes CronJob that we enabled when we set the value of backup.enabled to true.
The CronJob is set to run every day at 2 AM (based on the 0 2 * * * value under the SCHEDULE column, which we specified in backup.schedule) and uploads the contents of /var/jenkins_home to the GCS bucket we specified in backup.destination.
The container which runs the backup tasks is based on the maorfr/kube-task public image from Docker Hub.
If you want to learn more about the CronJob, please check it out here.
7. Access Jenkins, Update Plugins and Create Sample Credentials, Jobs, etc
Now, backing up is not fun if we only backup the default Jenkins installation, right? So, in this section we will create a sample Job, username-password credentials, and download a non-default plugin. With that we can better demonstrate that the Jenkins Backup and Restoration work properly.
Let’s start by getting access to the Jenkins Dashboard. Use this command to port forward the jenkins service to your workstation:
kubectl --namespace jenkins port-forward svc/jenkins 8080:8080;
Now open a browser and enter http://localhost:8080 to access the Jenkins web dashboard.
Enter admin for the username and enter the Jenkins password you obtained in previous step.
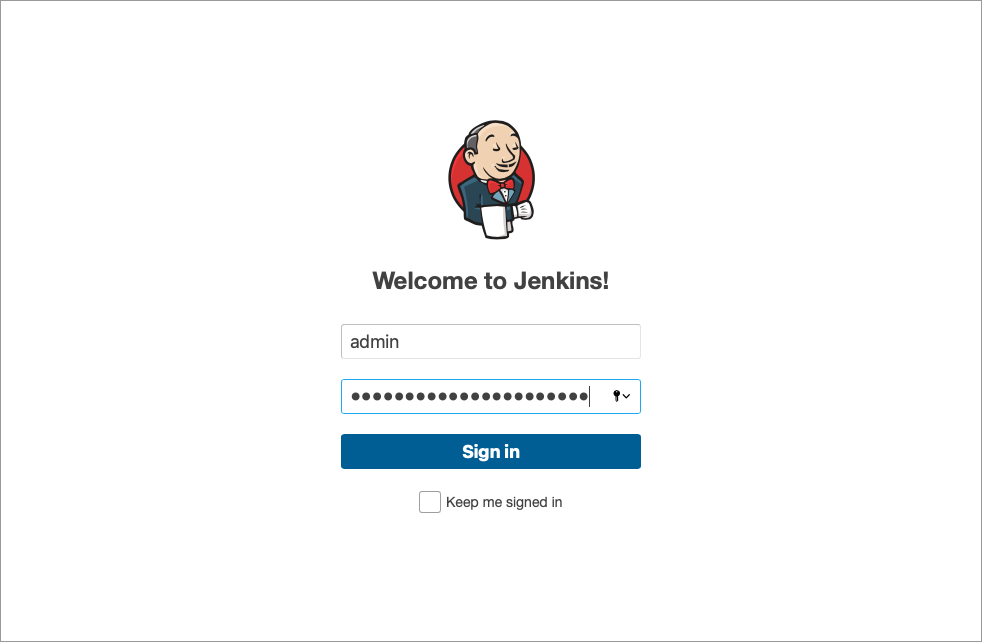
Image 2: Jenkins Login
Now, it’s time to create resources in Jenkins that can be backed up by the CronJob. Let’s do the following:
- Create a job called
hello_world- Go to using Freestyle Project Template.
- Create a build step that runs the
echo "Hello World"shell command. - Run the
hello_worldjob once.
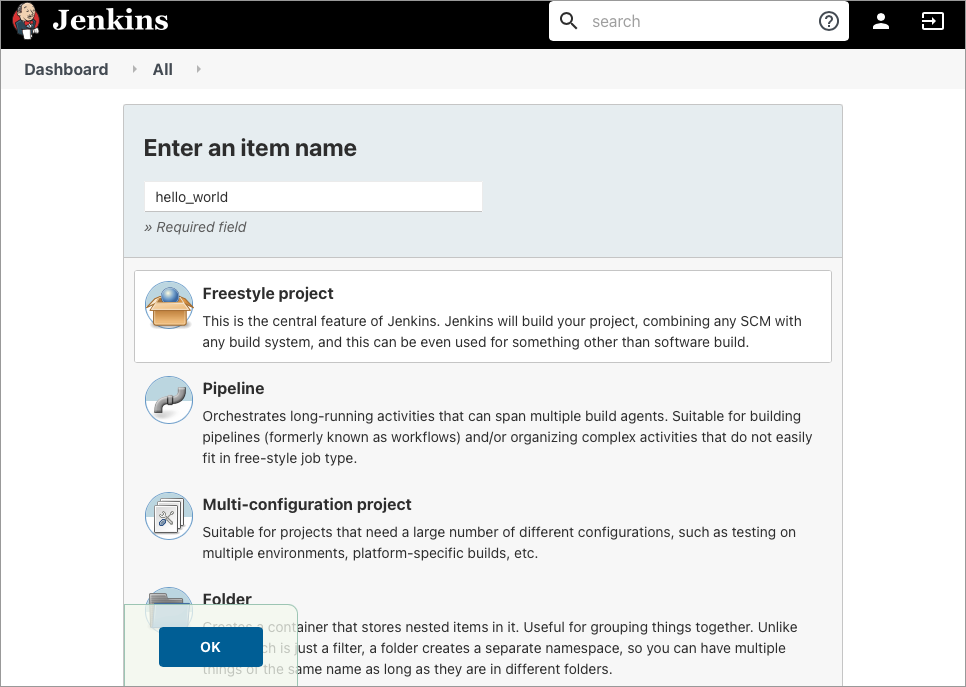
Image 3: Create a new Freestyle Job
- Create username/password credentials
- Go to http://localhost:8080/credentials/store/system/domain/_/ and clicking on
Add Credentials. - The type of credential doesn’t matter, as long as you can identify it later when we restore Jenkins from a backup.
- Go to http://localhost:8080/credentials/store/system/domain/_/ and clicking on
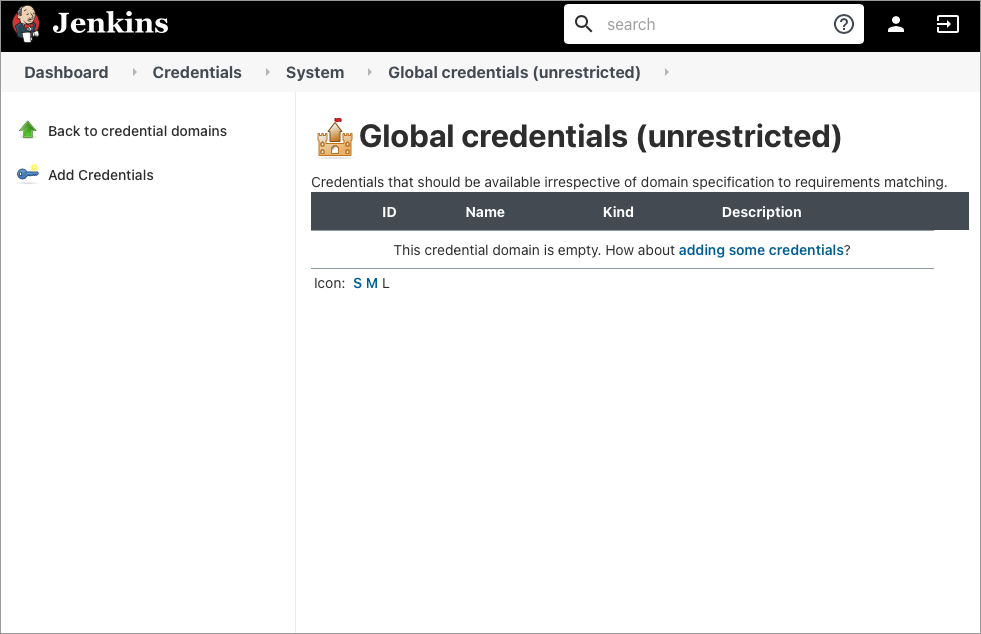
Image 4: Create Credentials
- Download
Dark ThemePlugin- Go to http://localhost:8080/pluginManager/available.
- Search for
Dark Themeand install it.
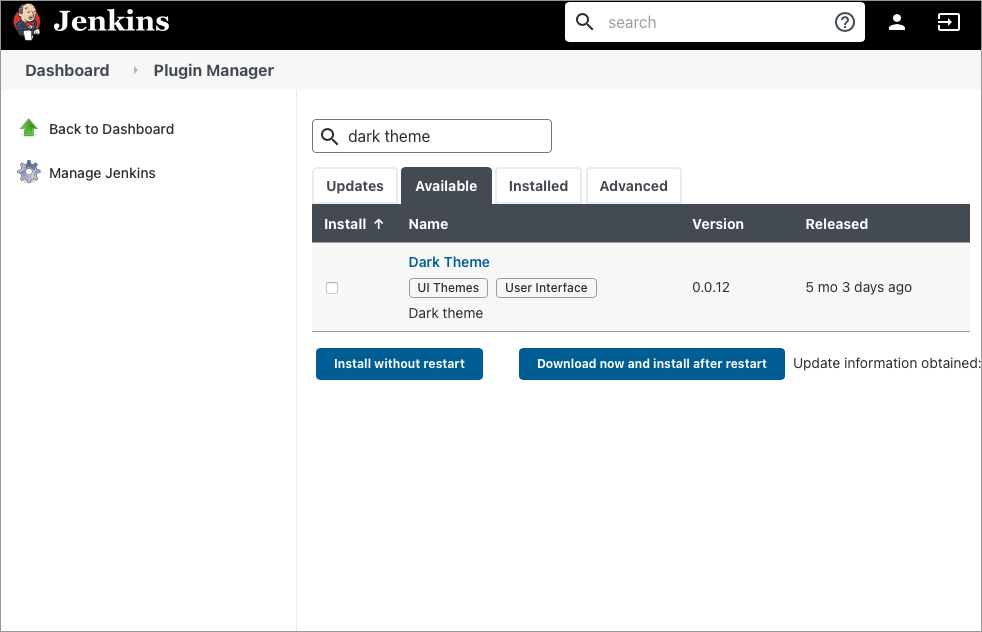
Image 5: Download Dark Theme Plugin
NOTE: You can create whatever you want, the above is just something that covers very common use cases.
8. Modify the CronJob to run every minute
Now that we created non-default resources on Jenkins, let’s go ahead and modify the CronJob so that it runs every minute, just to test the backup quickly.
To do so, run the following steps:
# Press CTRL+C to cancel the port forwarding or open a new Terminal window

# Update CronJob to run every minute
kubectl -n jenkins patch cronjob.batch/jenkins-backup --patch '{"spec": {"schedule": "* * * * *"}}'

# Run this command until the "jenkins-backup-*" container is running
kubectl get pods | grep backup;

# To prevent multiple jobs from spanning every minute, change CronJob back to original value
kubectl -n jenkins patch cronjob.batch/jenkins-backup --patch '{"spec": {"schedule": "0 2 * * *"}}'

# Get backup container name
BACKUP_CONTAINER=$(kubectl get pods | grep backup | awk '{print $1}');

# Stream logs of backup container until job is finished
kubectl logs -f ${BACKUP_CONTAINER};
Now check in GCP Storage Bucket to confirm that the PVC was backed up.

Image 6: Jenkins Backup on GCS
The backup folder takes the data and time the backup was taken, and every time the backup job runs again, it will create a new folder for that date and time combination.
If you see your backup listed there, then congratulations on successfully backing up Jenkins to GCS storage!
9. Redeploy a Clean Jenkins Installation
Now let’s pretend that your Jenkins server died and you lost all of your data. Let’s delete it and reinstall it with the following commands:
# Delete Jenkins Helm Chart
helm delete jenkins;

# Re-install Jenkins Helm Chart
helm upgrade --install jenkins --namespace jenkins \
    -f values.yaml \
    jenkinsci/jenkins --version 3.5.8;

# Run multiple times until "jenkins-0" pod is running
kubectl -n jenkins get pod -o wide;

# Once running, obtain Jenkins Password and save into a file
kubectl exec --namespace jenkins -it svc/jenkins -c jenkins -- /bin/cat /run/secrets/chart-admin-password > jenkins-password-new.txt;

# Print the password on screen
cat jenkins-password-new.txt;
11. Create ClusterRole and ClusterRoleBinding for Restore Job
In order for the restore jobs to download the backup files from GCS and restore the backup contents on the PVC of the new Jenkins installation, we need to create a Kubernetes Service Account (not to be confused with a GCP Service Account, like the one we created earlier) with the proper ClusterRole and ClusterRoleBinding.
To do so, create a file called restore-rbac.yaml, copy the content below, and save it.
---
apiVersion: rbac.authorization.k8s.io/v1
kind: ClusterRole
metadata:
  labels:
    app: skbn
  name: skbn
rules:
- apiGroups: [""]
  resources: ["pods", "pods/log"]
  verbs: ["get", "list"]
- apiGroups: [""]
  resources: ["pods/exec"]
  verbs: ["create"]
---
apiVersion: rbac.authorization.k8s.io/v1
kind: ClusterRoleBinding
metadata:
  labels:
    app: skbn
  name: skbn
roleRef:
  apiGroup: rbac.authorization.k8s.io
  kind: ClusterRole
  name: skbn
subjects:
- kind: ServiceAccount
  name: skbn
  namespace: jenkins
---
apiVersion: v1
kind: ServiceAccount
metadata:
  labels:
    app: skbn
  name: skbn
  namespace: jenkins
Then deploy those resources:
# Deploy RBAC resources
kubectl apply -f restore-rbac.yaml;

# Verify that the resources were created
kubectl get clusterrole skbn;
kubectl get clusterrolebinding skbn;
12. Deploy the Jenkins Restore Job
FINALLY we can deploy the restore job!!! Now you need to obtain the path to the latest backup, which we will use in the restore job later on, using the following command:
gsutil ls gs://BUCKET_NAME/jenkins-k8s-backup; # Replace with your bucket name
Which will give you an output similar to the one below, which will vary based on your bucket name and how many backups you have:
# Your Bucket Name will be listed here:
gs://BUCKET_NAME/jenkins-k8s-backup/20210717154947/
Now create a file called restore.yaml, and copy the code below into it, replace BUCKET_NAME and BACKUP_NAME with the values obtained from previous steps, then save it.
apiVersion: batch/v1
kind: Job
metadata:
  labels:
    app: skbn
  name: skbn
  namespace: jenkins
spec:
  template:
    metadata:
      labels:
        app: skbn
    spec:
      restartPolicy: OnFailure
      serviceAccountName: skbn
      containers:
      - name: skbn
        image: maorfr/skbn
        command: ["skbn"]
        args:
        - "cp"
        - "--src"
        - "gcs://BUCKET_NAME/jenkins-k8s-backup/BACKUP_NAME" # Replace with Bucket Name and Backup Name from previous step
        - "--dst"
        - "k8s://jenkins/jenkins-0/jenkins/var/jenkins_home"
        imagePullPolicy: IfNotPresent
        env:
        - name: GOOGLE_APPLICATION_CREDENTIALS
          value: /var/run/secrets/jenkinsgcp/sa-credentials.json
        volumeMounts:
        - mountPath: /var/run/secrets/jenkinsgcp
          name: jenkinsgcp
      volumes:
      - name: jenkinsgcp
        secret:
          secretName: jenkinsgcp
This job uses the maorfr/skbn, which, when provided a secret with the GCP Service Account with GCS Admin privileges via the GOOGLE_APPLICATION_CREDENTIALS environment variable, will download the contents of the specified backup path into the GCS Bucket as specified by the k8s://NAMESPACE/POD_NAME/CONTAINER_NAME/var/jenkins_home path in the Job above.
Now let’s deploy the backup job!!!
# Deploy restore job
kubectl apply -f restore.yaml;

# Run this command until the "skbn" container is running
kubectl get pod | grep skbn;

# Get restore container name
RESTORE_CONTAINER=$(kubectl get pods | grep skbn | awk '{print $1}');

# Stream logs of restore container until job is finished
kubectl logs -f ${RESTORE_CONTAINER};
Watch the logs until the job is done. Depending on your internet connection, the job takes about 13 minutes.
Verify Successful Restore from Backup
MOMENT OF TRUTH!!! Now we get to verify that the Restore from GCS backup of Jenkins was successfully applied to a new and clean installation of Jenkins.
To do so, let’s start by port-forwarding the jenkins service into your workstation,
kubectl --namespace jenkins port-forward svc/jenkins 8080:8080;
Now open a browser and enter http://localhost:8080 to access Jenkins console.
Login, then click on Manage Jenkins-> Reload Configuration from Disk, then press OK.
Image 7: Reload contents from disk
Jenkins is now going to reload the backed up content from the disk and restart. Now, you will not be able to login using the password for the new installation for Jenkins. Because we are restoring from the backup of a previous installation, we need to login using the password for the old Jenkins installation.
Now, you saved that password into a file when you installed Jenkins for the first time. So, all we have to do is retrieve it using the following command:
cat jenkins-password.txt;
Now login again with the old password and you should be able to see everything from the previous installation (Job, Plugin, and Credentials).
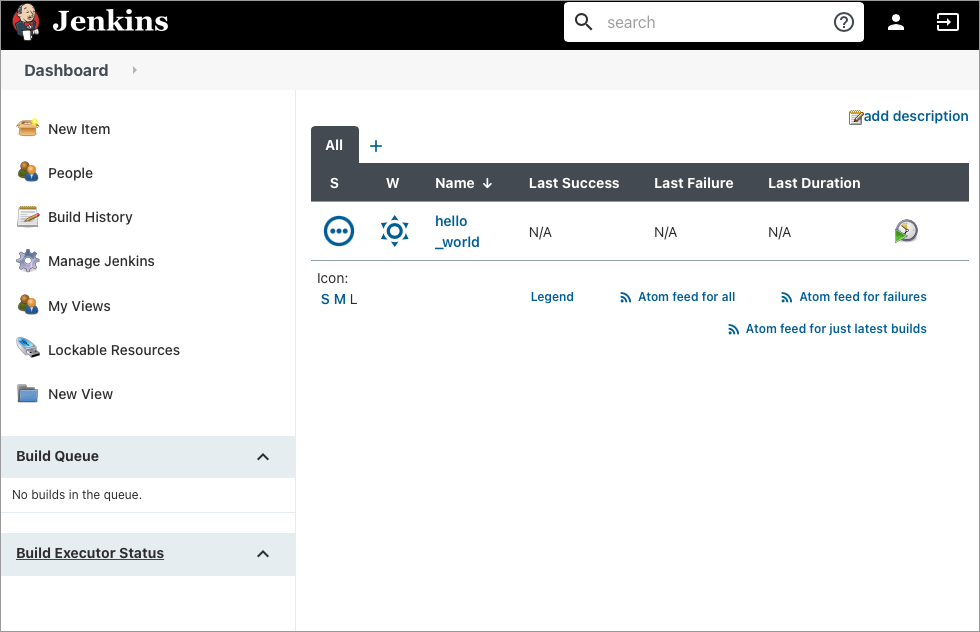
Image 8: Jenkins has been successfully restored!
If you can see in this Jenkins installation the Job, Plugin, Credentials and whatever else you created in the previous jenkins installation, then CONTRATULATIONS!!! You have successfully restored Jenkins from a previous GCS backup!
Conclusion
Whew, that was quite a ride! Hopefully it wasn’t overwhelming. The principles of it are simple though: backup daily automatically and restore as needed using Kubernetes resources declared in YAML files.
While this is not full blown backup and restore solution, the simplicity and familiarity of it (assuming you know Kubernetes and Jenkins already) makes it easy to implement without having to learn a completely new tool.
Another benefit of using YAML files is that they can be stored in source control and improved upon and used as needed. Basically, anyone with Kubernetes and Jenkins experience can run the restore job and expect the same result.